
The safest expedition choice isn’t guided or solo; it’s the one where you’ve correctly priced and offloaded the highest-consequence risks.
- Guided trips aren’t just “more expensive”; their cost covers critical, often invisible, liabilities like evacuation logistics, permit navigation, and high-stakes decision-making.
- Solo travel’s “freedom” comes at the cost of total accountability for medical emergencies, contingency planning, and significant decision fatigue that can impair judgment.
Recommendation: Before going solo, rigorously audit your capacity to manage a catastrophic failure—medically, financially, and logistically—without external support.
You’ve summited peaks and navigated trails alone. The appeal of a truly remote destination—Patagonia’s raw expanse, Alaska’s untamed wilderness—is a logical next step for an experienced hiker. The question is no longer if you can handle it, but how to approach it. The standard calculus is familiar: the structured safety of a guided group versus the unparalleled freedom of a solo journey. This debate often revolves around simple trade-offs of cost versus independence, or camaraderie versus solitude.
But this is a dangerously simplistic framework. For the serious adventurer, safety isn’t a feeling; it’s a system of risk mitigation. The most critical threats on a remote expedition are not always bears or crevasses—they are often logistical failures, medical blind spots, and the crippling weight of cumulative decision fatigue. The real choice is not between a guide and independence, but about which catastrophic risks you are willing and able to own personally. A guide is not a crutch for the inexperienced; for the expert, they are a professional risk-management asset.
This analysis moves beyond the surface-level pros and cons. It deconstructs the hidden liabilities of remote travel to provide a professional framework for your decision. We will examine the true cost of expeditions, the brutal realities of solo medical evacuation, the cognitive burden of constant decision-making, and the administrative traps that can end a trip before it begins. This is about understanding what you are truly paying for with a guide, and what you are truly taking on when you go it alone.
Summary: A Risk-Management Framework for Remote Expeditions
- Why Do Guided Expeditions Cost 3x More Than Solo Trips?
- How to Handle a Medical Evacuation When You Are Solo?
- Group Pace vs. Own Pace: Which Is Less Exhausting Mentally?
- The Visa Mistake That Cancels Expeditions at the Border
- Checking References: 3 Questions to Ask a Guide Company Before Booking
- How to Identify Truly Private Beaches vs Publicly Accessible Coasts?
- 3 Months or 6 Months: How Much Cash to Keep Liquid in a Crisis?
- Hiking in Shoulder Season: Equipment Essentials for Unpredictable Alpine Weather
Why Do Guided Expeditions Cost 3x More Than Solo Trips?
The significant price difference between a guided and a solo expedition is often the primary factor in a hiker’s decision. However, framing this as a simple “cost” is a critical error in risk assessment. A more accurate view is that you are not paying for a travel companion; you are paying a premium to offload catastrophic liability and invisible labor. The higher price covers layers of professional risk management that an independent hiker must assume entirely on their own, often without realizing the full scope.
This “invisible labor” includes hundreds of hours of pre-trip logistical work: securing time-sensitive and competitive permits, navigating complex local regulations, arranging in-country transport, vetting food suppliers, and establishing emergency communication protocols. On the trail, the guide’s fee covers their professional liability insurance, redundant safety equipment (satellite phones, extensive medical kits), and, most importantly, their cognitive bandwidth. They are paid to make high-stakes decisions under pressure, freeing you to focus on your physical performance and situational awareness.
While the solo travel market is booming, a telling statistic reveals that even seasoned independent travelers understand this value proposition. Even as solo bookings have surged, over a third of solo travelers still opt for guided tours when heading to high-risk destinations. They are consciously “pricing the risk” and choosing to pay a professional to manage it. The 3x figure is not an expense; it is the price of a comprehensive safety and logistics insurance policy.
How to Handle a Medical Evacuation When You Are Solo?
The single greatest liability a solo adventurer assumes is 100% ownership of their own rescue. In a guided group, a medical emergency triggers a well-rehearsed chain of command. A solo incident, however, initiates a cascade of failure points that can be fatal. The first challenge is communication; activating a personal locator beacon is just the beginning. You are now a passive victim, unable to coordinate logistics, communicate your exact condition, or provide updates to rescuers. Your survival depends entirely on the efficiency of a third-party response center and the availability of local search-and-rescue (SAR) assets.
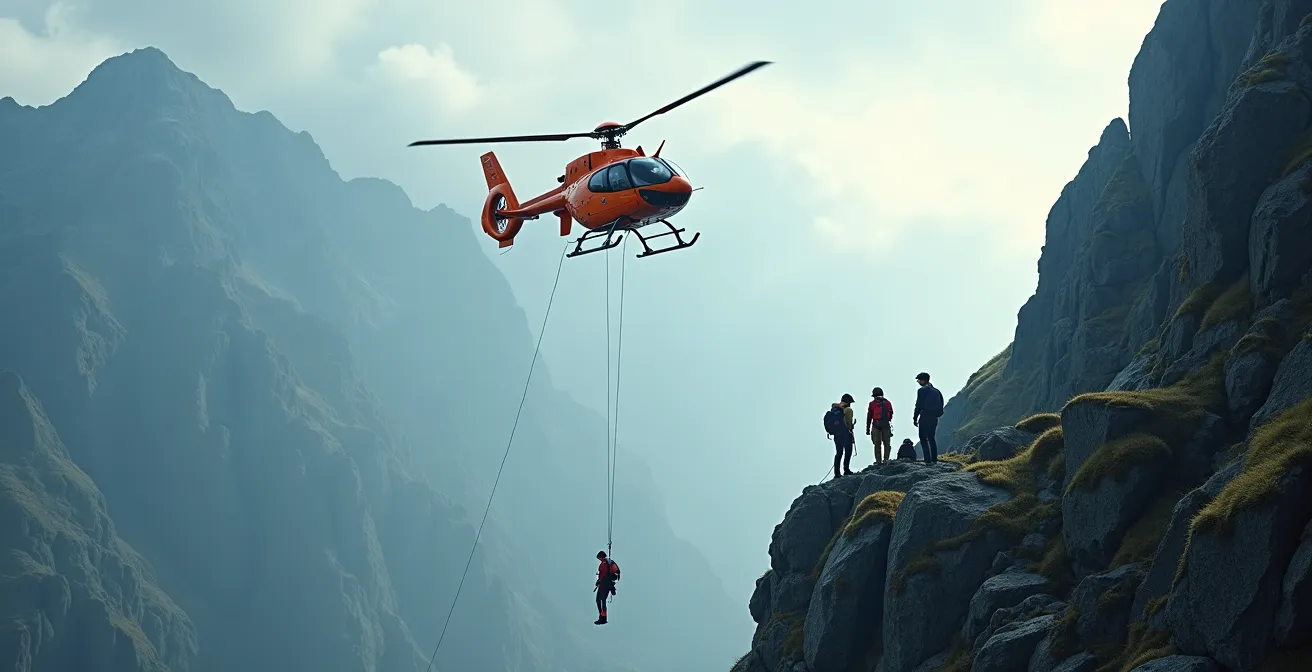
Financially, the consequences are devastating. A medical evacuation is not a simple ambulance ride. Depending on the remoteness and complexity of the rescue, CDC data shows evacuation costs range from $25,000 to over $250,000. Many adventurers mistakenly believe their standard travel insurance covers this, but often “evacuation” only means hospital-to-hospital transport, not the critical field rescue from the point of injury. A guide company’s operational insurance and direct partnerships with services like Global Rescue are designed to manage precisely this scenario, bridging the gap where personal policies fail.
A solo hiker must build their own rescue system from scratch. This is a significant logistical undertaking that must be completed flawlessly before departure. Key steps include:
- Pre-registering your insurance policy with your satellite device’s response center.
- Carrying digital and physical copies of your insurance, and memorizing the policy number.
- Creating a detailed itinerary with GPS waypoints shared with multiple, reliable emergency contacts.
- Establishing and adhering to a rigid satellite messenger check-in schedule (e.g., twice daily at 8 AM and 8 PM).
- Understanding that certain destinations, like Antarctica, have mandatory minimums, often requiring $100,000 in evacuation coverage just to be allowed in-country.
Group Pace vs. Own Pace: Which Is Less Exhausting Mentally?
The freedom to set one’s own pace is a primary motivator for solo expeditions. The ability to hike faster, slower, or take breaks at will seems like a clear advantage over being locked into a group’s rhythm. However, this perspective often overlooks a more insidious form of exhaustion: decision fatigue. On a solo expedition, your physical pace may be your own, but your brain is never at rest. Every route choice, weather assessment, water source check, and gear adjustment is your sole responsibility.
This constant, low-level cognitive load depletes mental energy, a finite resource as critical as calories or water. When decision fatigue sets in, judgment becomes impaired, risk assessment becomes sloppy, and small navigational errors can escalate. A guide offloads the vast majority of this mental burden. By managing navigation, timing, and logistical micro-decisions, they preserve your cognitive resources for what matters most: enjoying the landscape and maintaining a high level of personal-safety awareness.
The following table, based on an analysis of expeditionary mental challenges, breaks down the difference in cognitive load:
| Mental Challenge | Solo Impact | Guided Impact |
|---|---|---|
| Decision Fatigue | High – constant route/weather/resource decisions | Low – guide handles 90% of decisions |
| Social Pressure | None | Moderate – keeping pace with group |
| Navigation Stress | High – sole responsibility | Minimal – guide expertise |
| Emergency Planning | Exhausting – all contingencies on you | Relaxed – team support available |
| Mindfulness Opportunity | Variable – often interrupted by logistics | High – mental space for experience |
While the social pressure of a group pace is a real factor, it is a predictable and manageable stressor. The relentless cognitive drain of total self-reliance is a far more dangerous and underestimated risk for the solo adventurer. The question is not just about physical pace, but about the sustainability of your mental endurance over the course of a multi-week expedition.
The Visa Mistake That Cancels Expeditions at the Border
For an experienced hiker, a technical gear failure is a manageable problem. A catastrophic administrative failure, however, can be an insurmountable one. One of the most overlooked risks of solo travel is navigating the labyrinth of visas, climbing permits, and restricted area access. This is a prime example of a contingency failure point where no amount of physical fitness or backcountry skill can help you. A simple misunderstanding of a local regulation can invalidate months of planning and thousands of dollars in investment.
Many countries differentiate between a general tourist visa, which grants entry, and special permits required for specific regions or activities. These permits are often only issued to nationally-registered guide companies or require a certified local guide as a mandatory condition. The solo trekker who arrives with only a tourist visa may find their planned route entirely inaccessible.
Case Study: The Nepal Permit Trap
Nepal’s trekking regulations provide a perfect example. While a tourist can obtain a visa on arrival for general travel, specific coveted routes like the Manaslu Circuit or Upper Mustang require a Restricted Area Permit (RAP). These permits are only granted to groups of two or more trekkers accompanied by a certified Nepali guide and registered through a local agency. Every year, solo trekkers arrive at checkpoints only to discover they cannot proceed. Their only options are to hire a guide and another “ghost” trekker at inflated last-minute prices, or abandon their expedition route entirely.
A professional expedition company absorbs this risk. Their business depends on mastering these bureaucratic nuances. They handle the applications, provide the necessary letters of invitation, and ensure all paperwork is compliant long before you board your flight. This administrative shield is a core component of the value they provide, protecting the expedition from a premature and costly end.
Checking References: 3 Questions to Ask a Guide Company Before Booking
Once you recognize that hiring a guide is an act of risk-management outsourcing, the vetting process changes. You are not just hiring a navigator; you are hiring a crisis manager, a logistician, and a medical first-responder. Your evaluation must go far beyond glossy brochures and curated testimonials. You need to audit their operational competence and crisis-response systems. This requires asking pointed, specific questions that reveal their true level of professionalism.
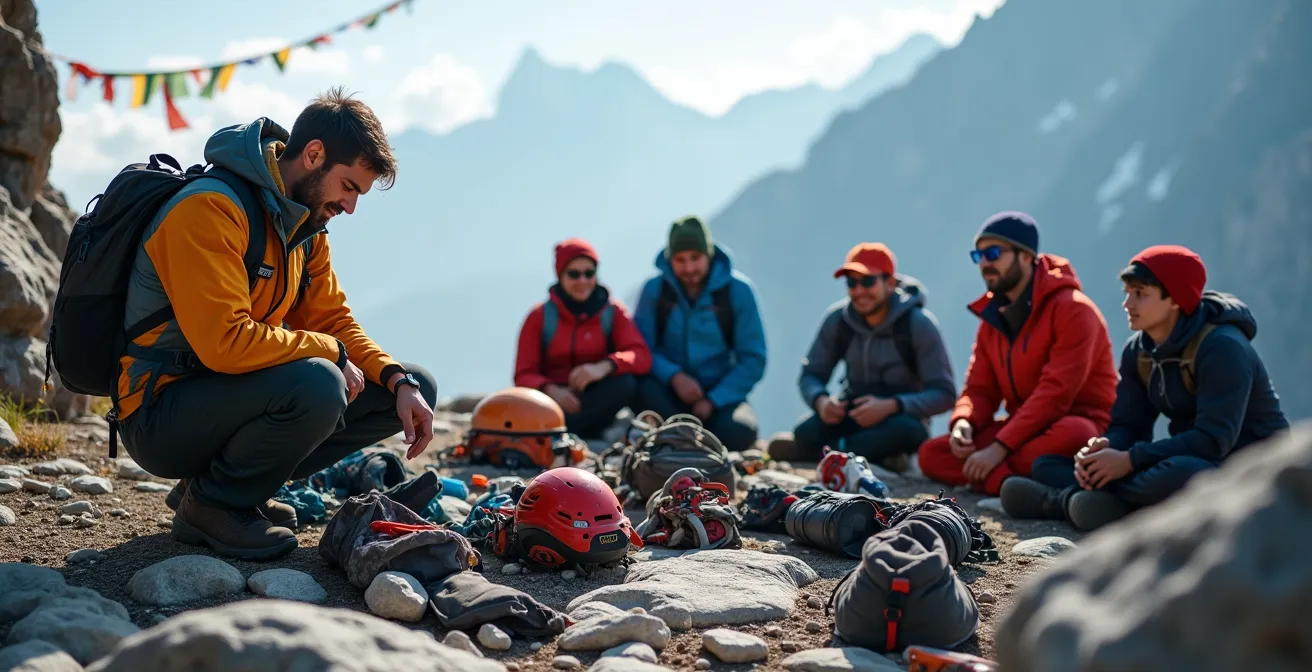
General questions like “Are your guides experienced?” are useless. Of course they will say yes. Instead, your inquiry should be designed to elicit evidence of their systems and protocols. An experienced and confident company will welcome this level of scrutiny, while a less professional outfit may become defensive or evasive. This vetting process is your first and most important safety check.
Before committing thousands of dollars and placing your safety in their hands, you must conduct your own due diligence. The following checklist provides a framework for this critical audit. These are not just questions; they are requests for verifiable proof of competence.
Your Vetting Checklist: Essential Questions for an Expedition Company
- Crisis Management Protocol: Ask them to “Describe a specific medical or logistical emergency from the last season. Detail the field team’s exact response, the communication timeline, and the steps taken to manage the situation.” A competent operator will have case studies ready.
- Guide-Specific Certifications: Do not accept “our guides are certified.” Ask, “What are the specific, verifiable certifications (e.g., Wilderness First Responder, IFMGA/UIMLA guide, Avalanche Level II) held by the *lead guide assigned to my specific departure date*?”
- Unfiltered Client References: Move beyond website testimonials. Request, “Can you connect me with two or three clients who completed this exact itinerary last season?” Speaking to past clients provides an unfiltered view of the on-the-ground reality.
- Insurance & Evacuation Integration: Inquire about their process: “Do you have a direct partnership with an evacuation service like Global Rescue? What is your protocol if I need a field rescue versus a standard medical evacuation?”
- Safety Equipment Redundancy: Understand their gear protocols. “What is your client-to-guide ratio, and what safety equipment redundancy do you carry? How many satellite phones, medical kits, and emergency shelters are standard for a group of my size?”
How to Identify Truly Private Beaches vs Publicly Accessible Coasts?
On the surface, a question about beach access might seem out of place in a discussion of high-altitude expeditions. However, it perfectly illustrates a critical and often underestimated aspect of solo expedition planning: navigating land access rights and local property laws. Whether you are planning a coastal trek or a mountain ascent, understanding what land is public, what is private, and what falls into a complex legal grey area is a fundamental piece of logistical “invisible labor.”
A solo explorer is solely responsible for this research. Misinterpreting access rights can lead to anything from an awkward encounter with a landowner to serious legal trouble or the forced abandonment of a route. The laws governing access to coastlines, riverbanks, and wild lands vary dramatically across the globe, and online maps are often unreliable indicators of legal right-of-way.
For example, as a comparative analysis of global access laws shows, the legal frameworks are wildly different. In Scotland, the “Right to Roam” grants broad public access for wild camping along most of the coast. Conversely, in parts of California, coastal access is fiercely contested and often blocked by private property. In Norway, the “Allemannsretten” (everyman’s right) allows camping along the coast, but only if you remain at least 150 meters from the nearest dwelling. New Zealand’s famous “Queen’s Chain” theoretically provides public access along most waterways, but its application is complex and fraught with exceptions.
A reputable guide company has already done this homework. Their itineraries are built upon years of local knowledge and an intimate understanding of these access laws. They know which routes are clear, which require special permission, and which landowners are amenable to passage. This legal and social navigation is another layer of risk they offload, ensuring your journey is not derailed by a “No Trespassing” sign in the middle of nowhere.
Key Takeaways
- The high cost of guided trips reflects the price of offloading significant risk, including logistical planning, liability, and emergency response management.
- A solo hiker bears 100% of the medical and financial liability for an evacuation, a scenario that can easily exceed $100,000 and requires a flawless personal emergency protocol.
- Vetting a guide company is not about their friendliness; it is a rigorous audit of their crisis management systems, guide certifications, and safety equipment redundancy.
3 Months or 6 Months: How Much Cash to Keep Liquid in a Crisis?
The concept of an emergency fund takes on a new, more urgent meaning in the context of a remote expedition. This is not just a buffer for unexpected expenses; it is a critical safety tool. The amount of liquid cash or credit you need is directly tied to your choice between a guided or solo journey. A solo adventurer must be self-insured against a wider array of potential financial shocks, necessitating a much larger contingency fund.
In a guided group, many potential financial crises are absorbed by the operator. If a piece of critical community gear fails (like the group stove), they provide the backup. If a logistical issue requires an extra night in a hotel, they often cover it. The solo hiker, by contrast, is their own safety net. You must be able to instantly cover the cost of replacing a broken GPS, a lost passport, a medical deductible, or an emergency flight home without assistance.
The following table, based on data from emergency assistance providers, illustrates the stark difference in the recommended liquid emergency funds needed for various scenarios. This is “risk pricing” in its most practical form.
| Emergency Type | Solo Fund Needed | Guided Fund Needed |
|---|---|---|
| Medical evacuation deductible | $5,000-$10,000 | $2,500-$5,000 |
| Emergency flight home | $2,000-$5,000 | $2,000-$5,000 |
| Critical gear replacement | $1,500-$3,000 | $500-$1,000 |
| Local emergency costs | $1,000-$2,000 | $500 |
| Total Recommended | $10,000-$20,000 | $5,500-$11,500 |
The question is not whether a three- or six-month emergency fund is appropriate in general terms. For a remote expedition, the calculation must be more specific. You must quantify the potential cost of the most likely and most severe financial emergencies you could face and ensure you have immediate access to those funds. For a solo hiker, this figure is consistently and significantly higher.
Hiking in Shoulder Season: Equipment Essentials for Unpredictable Alpine Weather
Choosing to travel in the shoulder season (late autumn or early spring) magnifies every risk. The weather is unpredictable, conditions can shift from pleasant to life-threatening in minutes, and the margin for error shrinks to zero. In this environment, the debate between guided and solo becomes a stark assessment of equipment redundancy and, more importantly, the proven skill to use it under extreme pressure.
A solo hiker’s gear list must be built around the assumption of critical system failure. You cannot rely on a single piece of equipment; every essential system requires a backup. This goes far beyond simply carrying extra batteries. It is a philosophy of resilience that guided groups achieve through sheer numbers and professional planning.
Your personal shoulder-season checklist must account for these failure scenarios:
- Primary Shelter Failure: You must carry an emergency bivy sack in addition to your tent.
- Waterproofing Failure: All critical insulation and sleeping gear must be stored in a fully sealed dry-bag system. A wet sleeping bag at freezing temperatures is a death sentence.
- Stove Failure: You need both cold-soak-ready emergency rations and a backup heat source (e.g., solid fuel tablets).
- Navigation Failure: You must have a paper map and compass and know how to use them, with pre-marked escape routes, as a backup to any electronic GPS.
- Traction Requirement: B2 or B3-rated mountaineering boots are non-negotiable for potential ice and snow, along with crampons and an ice axe.
Ultimately, the most important piece of equipment is training. As a leading mountaineering organization, High Mountain Guides, states in their safety protocols, gear without expertise is a liability.
Carrying an ice axe, crampons, or avalanche beacon is useless or even dangerous without certified training. This directly ties into the guided vs. solo choice.
– High Mountain Guides, Winter Alpine Mountaineering Safety Guidelines
A guide not only brings redundant professional-grade equipment but also the certified training and real-world experience to use it effectively in a crisis. A solo hiker must honestly assess if they possess both the gear and the battle-tested skills to match.
To apply this risk-management framework, the next step is to conduct a rigorous self-audit of your personal risk tolerance and contingency capabilities. Assess your expedition plan not just for its adventure, but for its potential failure points, and decide honestly which of those you are truly equipped to manage alone.
Frequently Asked Questions on Expedition Visas and Permits
Can I trek Everest region completely solo with just a tourist visa?
No. While the standard Everest Base Camp trek allows independent travel with the proper local permits (TIMS card and park entry), expeditions on Everest itself (above Base Camp) require affiliation with a registered expedition company. Climbing permits for the peak are only issued to these accredited agencies.
What’s the difference between a visa and a restricted area permit?
A visa is a document that grants you legal entry into a country for a specified period. A Restricted Area Permit (RAP) is a separate authorization required to enter specific, often politically or environmentally sensitive, zones within that country. Regions like Upper Mustang or Dolpo in Nepal require RAPs, which almost always mandate accompaniment by a certified local guide and often a minimum group size.
How do I prove onward travel for one-way trekking routes?
Many countries require proof of departure (an “onward ticket”) to grant a visa or entry, which is problematic for trekkers planning to cross a border on foot. A common and accepted solution is to purchase a fully refundable flight or a very cheap, disposable bus ticket online to a neighboring country. This ticket serves as the necessary documentation for border officials and can be canceled or discarded afterward.