
In summary:
- Success at altitude isn’t about generic fitness; it’s about training for oxygen efficiency and descent-specific strength.
- Simulate mountain conditions in a city using weighted stair climbing with a focus on long-duration sessions.
- Prioritize eccentric leg strength (controlled descents) to prevent the most common trekking injuries.
- Physiological training must be paired with a smart itinerary that respects acclimatization rules like “Climb High, Sleep Low.”
- Your gear, especially your layering system for sweat management, is a critical component of your performance and safety.
You see the photos from Everest Base Camp or the Inca Trail and the dream takes hold. But then reality hits. You live in a flat city, miles from the nearest mountain. The common advice you hear—”just do more cardio,” “get fit”—feels hopelessly vague. It’s the kind of advice that leads fit marathon runners to be airlifted off a mountain, humbled by something they never trained for: the lack of oxygen.
This is where most preparation plans fail. They focus on building a big “engine” at sea level, assuming it will translate directly to 5,000 meters. It won’t. High-altitude success has far less to do with your peak sea-level performance and everything to do with your body’s specific, trained resilience to a low-oxygen environment. It’s not about being a great athlete; it’s about becoming a ruthlessly efficient high-altitude machine.
So, what if the key wasn’t simply running farther, but training your body to handle the unique physiological and biomechanical stresses of the mountains? This guide is built on that principle. We’re going to bypass the generic fitness platitudes and focus on the scientific pillars of high-altitude preparation that you can build from any urban environment: managing hypoxic stress, simulating summit days, building descent-proof legs, and mastering the internal and external systems that keep you safe and strong.
This article will break down the exact strategies and scientific principles you need to transform your flat-land training into genuine mountain readiness. We will cover the physiological impact of low oxygen, provide a concrete training protocol for urban environments, and detail the safety checks and planning wisdom that turn a challenging trek into a successful expedition.
Summary: Your Training Blueprint for High-Altitude Trekking from the City
- Why Low Oxygen Levels Drop Your Performance by 30%?
- How to Use Skyscraper Stairs to Simulate Summit Days?
- Endurance or Leg Strength: Which Prevents Injury on Descent?
- The Knee Pain Sign That Means You Should Rest Before Your Trip
- The “Climb High, Sleep Low” Rule: Planning Your Itinerary for Safety
- The “Runner’s High” Mechanism: How to Trigger Neurochemical Release?
- How to Manage Sweat When the Air Temp Is Freezing?
- Guided Expedition or Solo Adventure: What Is the Safest Choice for Remote Destinations?
Why Low Oxygen Levels Drop Your Performance by 30%?
The first thing you feel at altitude isn’t tired legs; it’s a “foggy” brain and a surprising breathlessness, even at rest. This is hypoxic stress in action. With less oxygen available in each breath, your body struggles to power its two most demanding consumers: your muscles and your brain. The performance drop isn’t just physical; it’s cognitive. In fact, a 2024 systematic review found a 23% decrease in reaction time and a 20% reduction in memory accuracy at altitude. This is why simple tasks like tying your boots feel difficult and poor decisions are more common.
Your body’s response is to work harder. Your heart rate and breathing rate increase to compensate, trying to deliver the same amount of oxygen to your tissues. This elevated baseline effort means you have less capacity for physical work. An easy walk can push your heart rate into a zone that, at sea level, would be reserved for a hard run. This isn’t a failure of your “fitness”; it’s a fundamental crisis of supply and demand for oxygen.
The goal of your training is not necessarily to increase your lung capacity but to improve your body’s metabolic efficiency. This means training your cardiovascular system and muscles to do more work with less oxygen. Slow, progressive ascent is a real-world example of this principle. Studies comparing climbers who ascended to Everest Base Camp in four days versus eight days showed the slower group maintained significantly better oxygen saturation and lower heart rates. They gave their bodies time to adapt. Your training must mimic this same principle of progressive stress to trigger those crucial physiological adaptations before you even leave home.
Understanding this drop is the first step. It reframes your training goal from simply “getting fit” to building a body that is resilient and efficient in a low-oxygen world.
How to Use Skyscraper Stairs to Simulate Summit Days?
Your local skyscraper, office building, or stadium is the single best tool for simulating the relentless vertical gain of a mountain. Running on a flat treadmill builds cardiovascular endurance, but it fails to prepare your muscles for the specific stress of constant climbing with a pack. Stair climbing directly targets the correct muscle groups (quads, glutes, calves) and, when done correctly, simulates the systemic resilience needed for an 8-hour summit day.
The key is not to sprint. A real trek is a slow, grinding effort. Your goal is to train for duration and load. Start by building a base of 1-2 hours of continuous stair climbing. Wear the pack you intend to use on your trek, starting with a manageable weight (e.g., 10kg/22lbs) and gradually increasing it. This trains your shoulders, back, and core to handle the load for extended periods. A crucial technique to practice is the “rest step”—a momentary pause with a locked back leg on each step, allowing your skeleton, not your muscles, to support your weight. This is a vital energy-saving skill at high altitude.
The following protocol turns generic stair climbing into specific summit day simulation:
- Build the Load: Start with 10kg and progressively add weight until you are comfortably carrying 1.5x to 2x the weight you’ll have on your trek. This over-preparation makes your actual trek weight feel easy.
- Mimic the Grade: Most mountain trails are around a 30-degree incline, which stairs replicate perfectly. Focus on a steady, sustainable pace.
- Train for Duration: Work your way up to 4-6 hour sessions. This is more a mental challenge than a physical one, but it’s critical for preparing for long days on the mountain. Mix uphill and downhill sets.
- Stress Test Your System: Incorporate intervals where you push your heart rate higher than your intended trekking pace. This improves your lactate threshold and your ability to recover from strenuous sections.
- Practice Efficiency: Consciously use the rest step on every floor. This builds the technique into your muscle memory so it becomes automatic when you’re tired and low on oxygen.
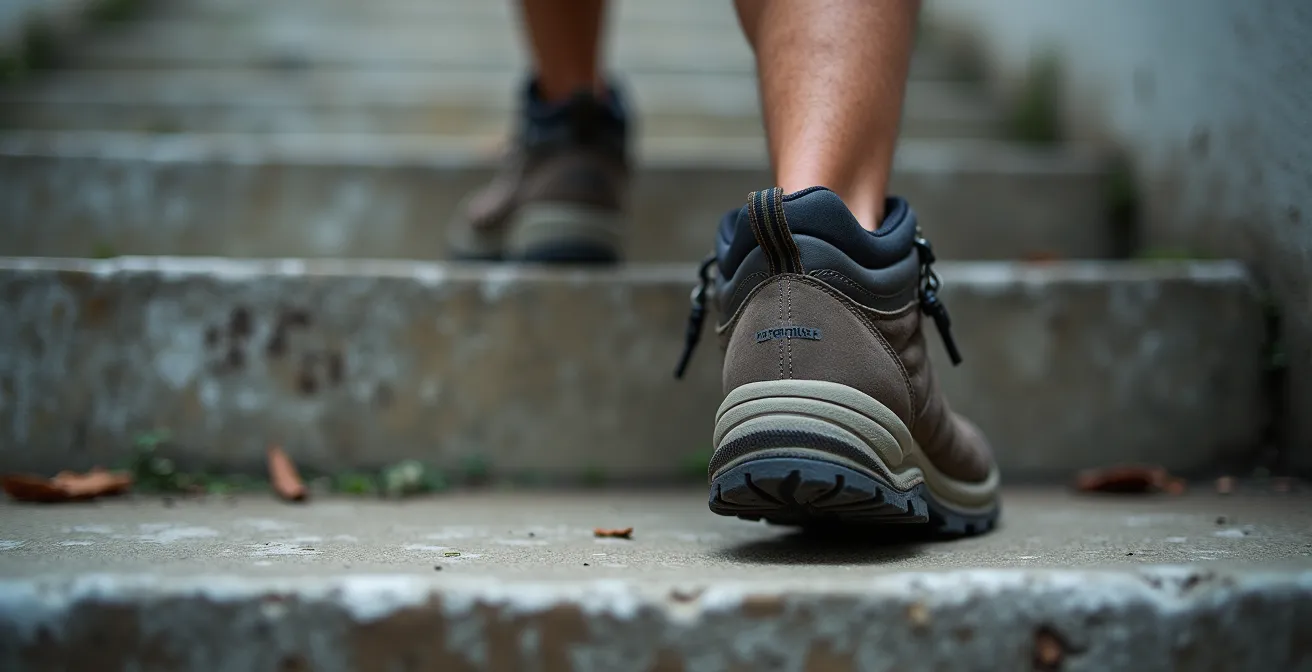
This image captures the essence of descent training, a critical and often-overlooked part of your stair routine. Controlling the downward movement is where you build true mountain-ready strength.
Remember, the goal is not speed but relentless, steady movement. Consistency in this type of training is what transforms an urban dweller into someone who can confidently face a summit push.
By treating stairs as your personal mountain, you build the specific physical and mental fortitude that flat-ground training can never provide.
Endurance or Leg Strength: Which Prevents Injury on Descent?
Most people focus their training on the climb up, building aerobic endurance. While crucial for managing hypoxic stress, it’s an incomplete picture. I’ve seen countless strong climbers reach the summit only to have their knees give out on the way down. The descent is what causes the most muscle damage and trip-ending injuries. The answer to the question is: you need both, but the missing piece for most flatlanders is descent-specific leg strength.
This comes down to a simple biomechanical principle: eccentric loading. When you climb (concentric contraction), your muscles shorten to lift you. When you descend (eccentric contraction), those same muscles must lengthen under load to act as brakes. This eccentric loading creates micro-tears in the muscle fibers, which is the primary cause of delayed onset muscle soreness (DOMS). Without specific training, your quads will be shredded after the first long descent, leading to poor form, instability, and immense stress on your knee joints.
Therefore, while your long, slow cardio sessions build endurance, you must supplement them with exercises that focus on eccentric strength. This includes weighted lunges, squats, and, most importantly, consciously controlling your descents during stair training. Don’t just clomp down the stairs; lower your body slowly and deliberately, forcing your quads to absorb the impact. Using trekking poles is also a skill to practice, as they can offload up to 25% of the impact from your knees.
Action Plan: Assessing Your High-Altitude Readiness
- Baseline Fitness: Log a continuous 4-hour hike or walk with a light pack. Can you complete it without excessive fatigue or joint pain? This establishes your endurance base.
- Strength Diagnostics: Perform the single-leg squat test as shown in the next section. Note any sharp pain, wobbling, or inability to control the movement, which indicates a strength imbalance.
- Gear Audit: Inventory your layering system and footwear. Do you have dedicated moisture-wicking base layers and broken-in boots? Gear failure is a form of unpreparedness.
- Training Load Capacity: Start with a 10kg (22lb) pack and climb stairs for 30 minutes. Document your heart rate and rate of perceived exertion (RPE). This gives you a starting point for progressive overload.
- Acclimatization Plan: Draft your day-by-day trek itinerary. Does it respect the “Climb High, Sleep Low” principle, limiting daily ascent to 300-500 meters above 3,000 meters?
A balanced training plan that dedicates specific time to eccentric strength is what separates those who enjoy the entire trek from those who merely survive the descent.
The Knee Pain Sign That Means You Should Rest Before Your Trip
As a coach, one of the most critical skills I teach athletes is to distinguish between “good pain” (muscle fatigue) and “bad pain” (an injury signal). For high-altitude trekkers, the most common “bad pain” is a sharp, localized pain at the front of the knee, typically in the patellar tendon just below the kneecap. This is often the first sign of Patellar Tendonitis, or “jumper’s knee,” an overuse injury exacerbated by the eccentric loading of descents. Ignoring this signal is a ticket to a failed expedition.
So, how do you know if you should push through or rest? There’s a simple diagnostic sign. If your knee pain improves or disappears as you warm up, it’s likely benign muscle or connective tissue tightness. However, if the pain is sharp during specific movements and worsens as you continue to train, that is a red flag. This specific symptom is a clear signal from your body that the tendon is inflamed and needs rest, not more stress.
A simple, effective self-diagnostic is the single-leg squat. Stand on one leg and slowly lower yourself into a squat. If you feel a sharp, stabbing pain in the patellar tendon, you have your answer.

This isn’t just anecdotal advice. A clinical study on athletes with this condition revealed a clear pattern. The research showed that athletes experiencing this type of sharp pain during single-leg squats or pain that worsened during activity had a 75% likelihood of developing chronic tendonitis if they continued their training regimen. In stark contrast, 85% of those who immediately rested and implemented a 2-3 week protocol of eccentric strengthening exercises achieved complete recovery before resuming full activity. The message is clear: listening to this specific pain signal and responding with targeted rest and rehab is the fastest way back to training, not a sign of weakness.
Two weeks of rest and focused rehab before your trip is infinitely better than being forced to turn back on day three of a trek you’ve spent a year planning.
The “Climb High, Sleep Low” Rule: Planning Your Itinerary for Safety
Your physical training is only half the equation for a successful high-altitude trek. The other half is a smart itinerary that allows your body to acclimatize. The golden rule of acclimatization, followed by every seasoned mountaineer, is “Climb High, Sleep Low.” This principle means you can (and should) ascend to a new high point during the day to expose your body to a higher altitude, but you must return to a lower elevation to sleep. This gives your body a period of relative recovery to produce more red blood cells and make other crucial physiological adaptations to the lower oxygen levels.
Violating this rule is the single biggest cause of Acute Mountain Sickness (AMS), a debilitating and potentially fatal condition. The most critical guideline is to limit your increase in sleeping altitude. Once you ascend above 3,000 meters (approx. 10,000 feet), you should not increase your sleeping elevation by more than 500 meters (1,640 feet) per night. This isn’t a suggestion; it’s a vital safety protocol. In fact, research on altitude exposure demonstrates that limiting daily elevation gain to 300-500 meters reduces the risk of AMS by a staggering 53%. Your itinerary should also include a dedicated rest day (with no change in sleeping altitude) for every 1,000 meters you ascend.
When booking a trip or planning your own, scrutinize the daily elevation gains. An itinerary that pushes you from 3,500m to 4,500m in one day is dangerously aggressive and designed for failure. A well-designed plan will feature shorter days, acclimatization hikes to higher points, and strategically placed rest days. It may seem slow, but it’s the fastest and safest way to the summit. Your body, not your ambition, sets the pace on the mountain.
No amount of training can compensate for a poorly planned ascent. Your fitness gives you the capacity to climb, but your itinerary determines if your body can safely adapt.
The “Runner’s High” Mechanism: How to Trigger Neurochemical Release?
Long days on a high-altitude trek are as much a mental battle as a physical one. The cold, the fatigue, and the sheer monotony of placing one foot in front of the other can wear you down. However, there’s a powerful neurochemical tool you can leverage to build mental resilience: the “runner’s high.” Often misunderstood as just a flood of endorphins, it’s a more complex cocktail that you can learn to trigger through your training.
The primary drivers are endorphins and, more significantly, endocannabinoids. Endorphins are your body’s natural opiates, which act as analgesics, dulling the perception of pain. They are typically released during high-intensity effort. However, the feeling of calm, reduced anxiety, and euphoria is largely attributed to endocannabinoids, particularly a molecule called anandamide. This is the body’s version of THC, and it’s released during sustained, moderate-intensity aerobic exercise.
The key to triggering this state is not sprinting; it’s finding a “flow state” pace. This is typically an effort of around 70-85% of your maximum heart rate, sustained for at least 45-60 minutes. It’s the “all-day pace” you should be cultivating in your long-duration training sessions. By consistently training in this zone, you teach your body to efficiently produce this neurochemical cocktail. On the mountain, when things get tough, tapping into this learned physiological response can change your entire experience. It transforms a suffer-fest into a meditative, powerful journey. The rhythmic crunch of your boots on the trail becomes a mantra, and the pain in your legs fades into the background.
This isn’t about ignoring pain; it’s about accessing a state of mind where the pain no longer dominates your consciousness, allowing you to push forward with focus and even joy.
How to Manage Sweat When the Air Temp Is Freezing?
At high altitude, moisture is your enemy. Getting wet from sweat when the air temperature is below freezing is not just uncomfortable; it’s a direct path to hypothermia. As you exert yourself on a climb, your body produces heat and sweat. When you stop for a break, that sweat rapidly cools and freezes, stealing precious warmth from your body. The common mistake is to overdress at the start of the day, leading to immediate overheating and sweating. The solution is a disciplined layering system and the courage to “be bold, start cold.”
Your layering system should consist of three distinct parts:
- The Base Layer: This is the layer directly against your skin. Its only job is to move moisture away from your body. It must be made of a synthetic material (like polyester) or merino wool. Cotton is forbidden. Cotton absorbs moisture and holds it against your skin, making you cold and clammy.
- The Mid Layer(s): This is your insulation. Fleece or a light down/synthetic puffy jacket works perfectly. The goal is to trap warm air. You might use one or two light mid-layers, adding or removing them to fine-tune your temperature.
- The Shell Layer: This is your protection from wind and precipitation. It should be a waterproof/breathable jacket (like one with a GORE-TEX membrane). Its job is to keep the elements out while allowing some of the moisture vapor from your sweat to escape.
The art of sweat management is proactive temperature regulation. You should start your hiking day feeling slightly cool, knowing that you will warm up within 10 minutes of moving. Before you get too hot, stop and remove a layer. Before you get cold on a break, add a layer. It’s a constant process of adjustment. Managing your layers effectively keeps you dry, and staying dry is the foundation of staying warm and safe in the mountains.
Your multi-thousand-dollar jacket is useless if your base layer is a wet cotton t-shirt. It’s the system, not a single piece of gear, that keeps you safe.
Key Takeaways
- High-altitude training is not about general fitness; it’s about targeted physiological adaptation to low oxygen and eccentric load.
- The descent is more biomechanically stressful than the ascent. Prioritizing eccentric leg strength is the key to preventing injury and finishing strong.
- Your itinerary is as critical as your training. A plan that respects the “Climb High, Sleep Low” rule is your best defense against Acute Mountain Sickness.
Guided Expedition or Solo Adventure: What Is the Safest Choice for Remote Destinations?
After all the training and preparation, you face one final, critical decision: do you join a guided expedition or go it alone? For a first-time high-altitude trekker heading to a remote destination like Nepal or Peru, the answer from a safety perspective is overwhelmingly clear: start with a reputable guided expedition. While the allure of a solo adventure is strong, the risks in a high-altitude, remote environment are significant and often invisible to the novice.
A guided expedition provides a crucial safety net. The guides are experts in acclimatization schedules, weather patterns, and, most importantly, recognizing the early signs of life-threatening conditions like High-Altitude Pulmonary Edema (HAPE) and High-Altitude Cerebral Edema (HACE). Their experience allows them to make critical decisions about turning back when an individual’s ego might push them forward. Furthermore, they handle all the logistics—permits, lodging, food, and transport—which are complex and stressful to manage in a foreign country. This frees you up to focus 100% of your energy on the trek itself.
A solo or independent trip offers more freedom and can be more rewarding for an experienced trekker. However, it places the entire burden of risk management on your shoulders. Are you confident in your ability to self-diagnose AMS? Do you have a robust emergency plan if you or your partner gets sick in a region with no cell service? Do you have the language skills and cultural knowledge to navigate local logistics? For your first foray into this environment, it’s wiser to learn from professionals. You can absorb their knowledge, understand the rhythm of a safe trek, and then apply that wisdom to your own independent adventures in the future.
Think of your first guided trek not as a limitation, but as the final, most important part of your high-altitude education. It’s an investment in the skills that will allow you a lifetime of safe mountain adventures.
Frequently Asked Questions on How to Train for High-Altitude Trekking
Can altitude tents really help if I live at sea level?
Yes, sleeping in hypoxic tents that simulate 3,000-4,500m altitude for 2-3 weeks before your trip can increase red blood cell count and improve acclimatization rates by up to 40%, according to studies with mountaineers.
What’s the minimum staging period needed at moderate altitude?
Research shows that spending just 2 nights at 2,500-3,000m before ascending higher can significantly reduce acute mountain sickness incidence, with optimal benefits achieved after 3-4 nights.
How does intermittent hypoxic training compare to altitude tents?
IHT using masks for 1 hour daily provides about 30% of the adaptation benefits of sleeping in altitude tents, but when combined with high-intensity training, can still meaningfully improve altitude performance.